

I’m kind of in love with hedgehogs right now, and I ALWAYS love flowers. Making PJs from this fabric just adds an element of fun to life!
So, this pattern. No secret that I love Itch-to-Stitch patterns. No cup sizes in this pattern - the wrap style makes the top very forgiving size-wise. There is a pocket on the front of the top. It holds a phone fine - which may be all you need. But, I think it wouldn't be too hard to add pockets to the pants. And I don't think it would affect their comfort at all. While we're talking about the pockets,

The longer I have sewn, the pickier I have gotten about the way the inside looks. So, I used French seams on the pants seams, as well as attaching the sleeves on the top to the bodice (there are lots of great tutorials about how to do this).

That tag on the waistband? I ordered these about 25 years ago - you may or may not be old enough to remember when they advertised things like this in sewing magazines and you filled out an order form and mailed it in and then they sent them to you. At any rate, believe it or not, I still have them! I added one of those – it’s nice to easily be able to identify the back.
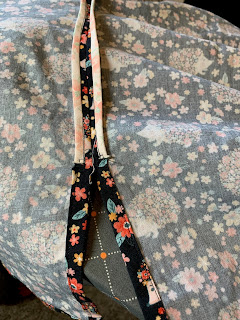
The pajama top has vents at the bottom of the side seams. To make these vents you need to press the entire seam open (which you can’t do with a French seam). So, I used a Hong Kong finish for the side seams (again, check out some online tutorials if you haven’t done that before). It turned out so nice, and looks so pretty on the inside!

Let's talk about directional fabric for a minute. We don't really want upside down hedgehogs!! I was super careful as I cut it to make sure that all the pieces were right side up. However, the collar band is just rectangles. I could have sewed them either way, but I forgot to think about it and now I have upside down hedgehogs on my collar band. It took me several days to even notice, and I don’t think most people will – but I’m always looking to up my sewing game – and I can’t do that if I don’t learn. So, I just filed it away for next time (and I’ll pass that little word of wisdom on to you because I’m nice like that!). Pay attention to how the collar band will sit when you go to sew it on.
I really love the finished product! I have loved wearing them about the house, working from home, and having something special to wear when we have company staying with us. What makes pajamas fun for you?


*I received this fabric from Minerva in exchange for posting about it on their site. The views and opinions expressed are all mine.
No comments:
Post a Comment