Wednesday, February 17, 2021

Rebecca Page Circle Cardie Mashup


I love a good cardigan. It can really be a statement piece for an outfit or it can just be a practical basic. I made a Sinclair Patterns Harper Cardigan (which is a free pattern by the way) awhile back to post on the Minerva site. 
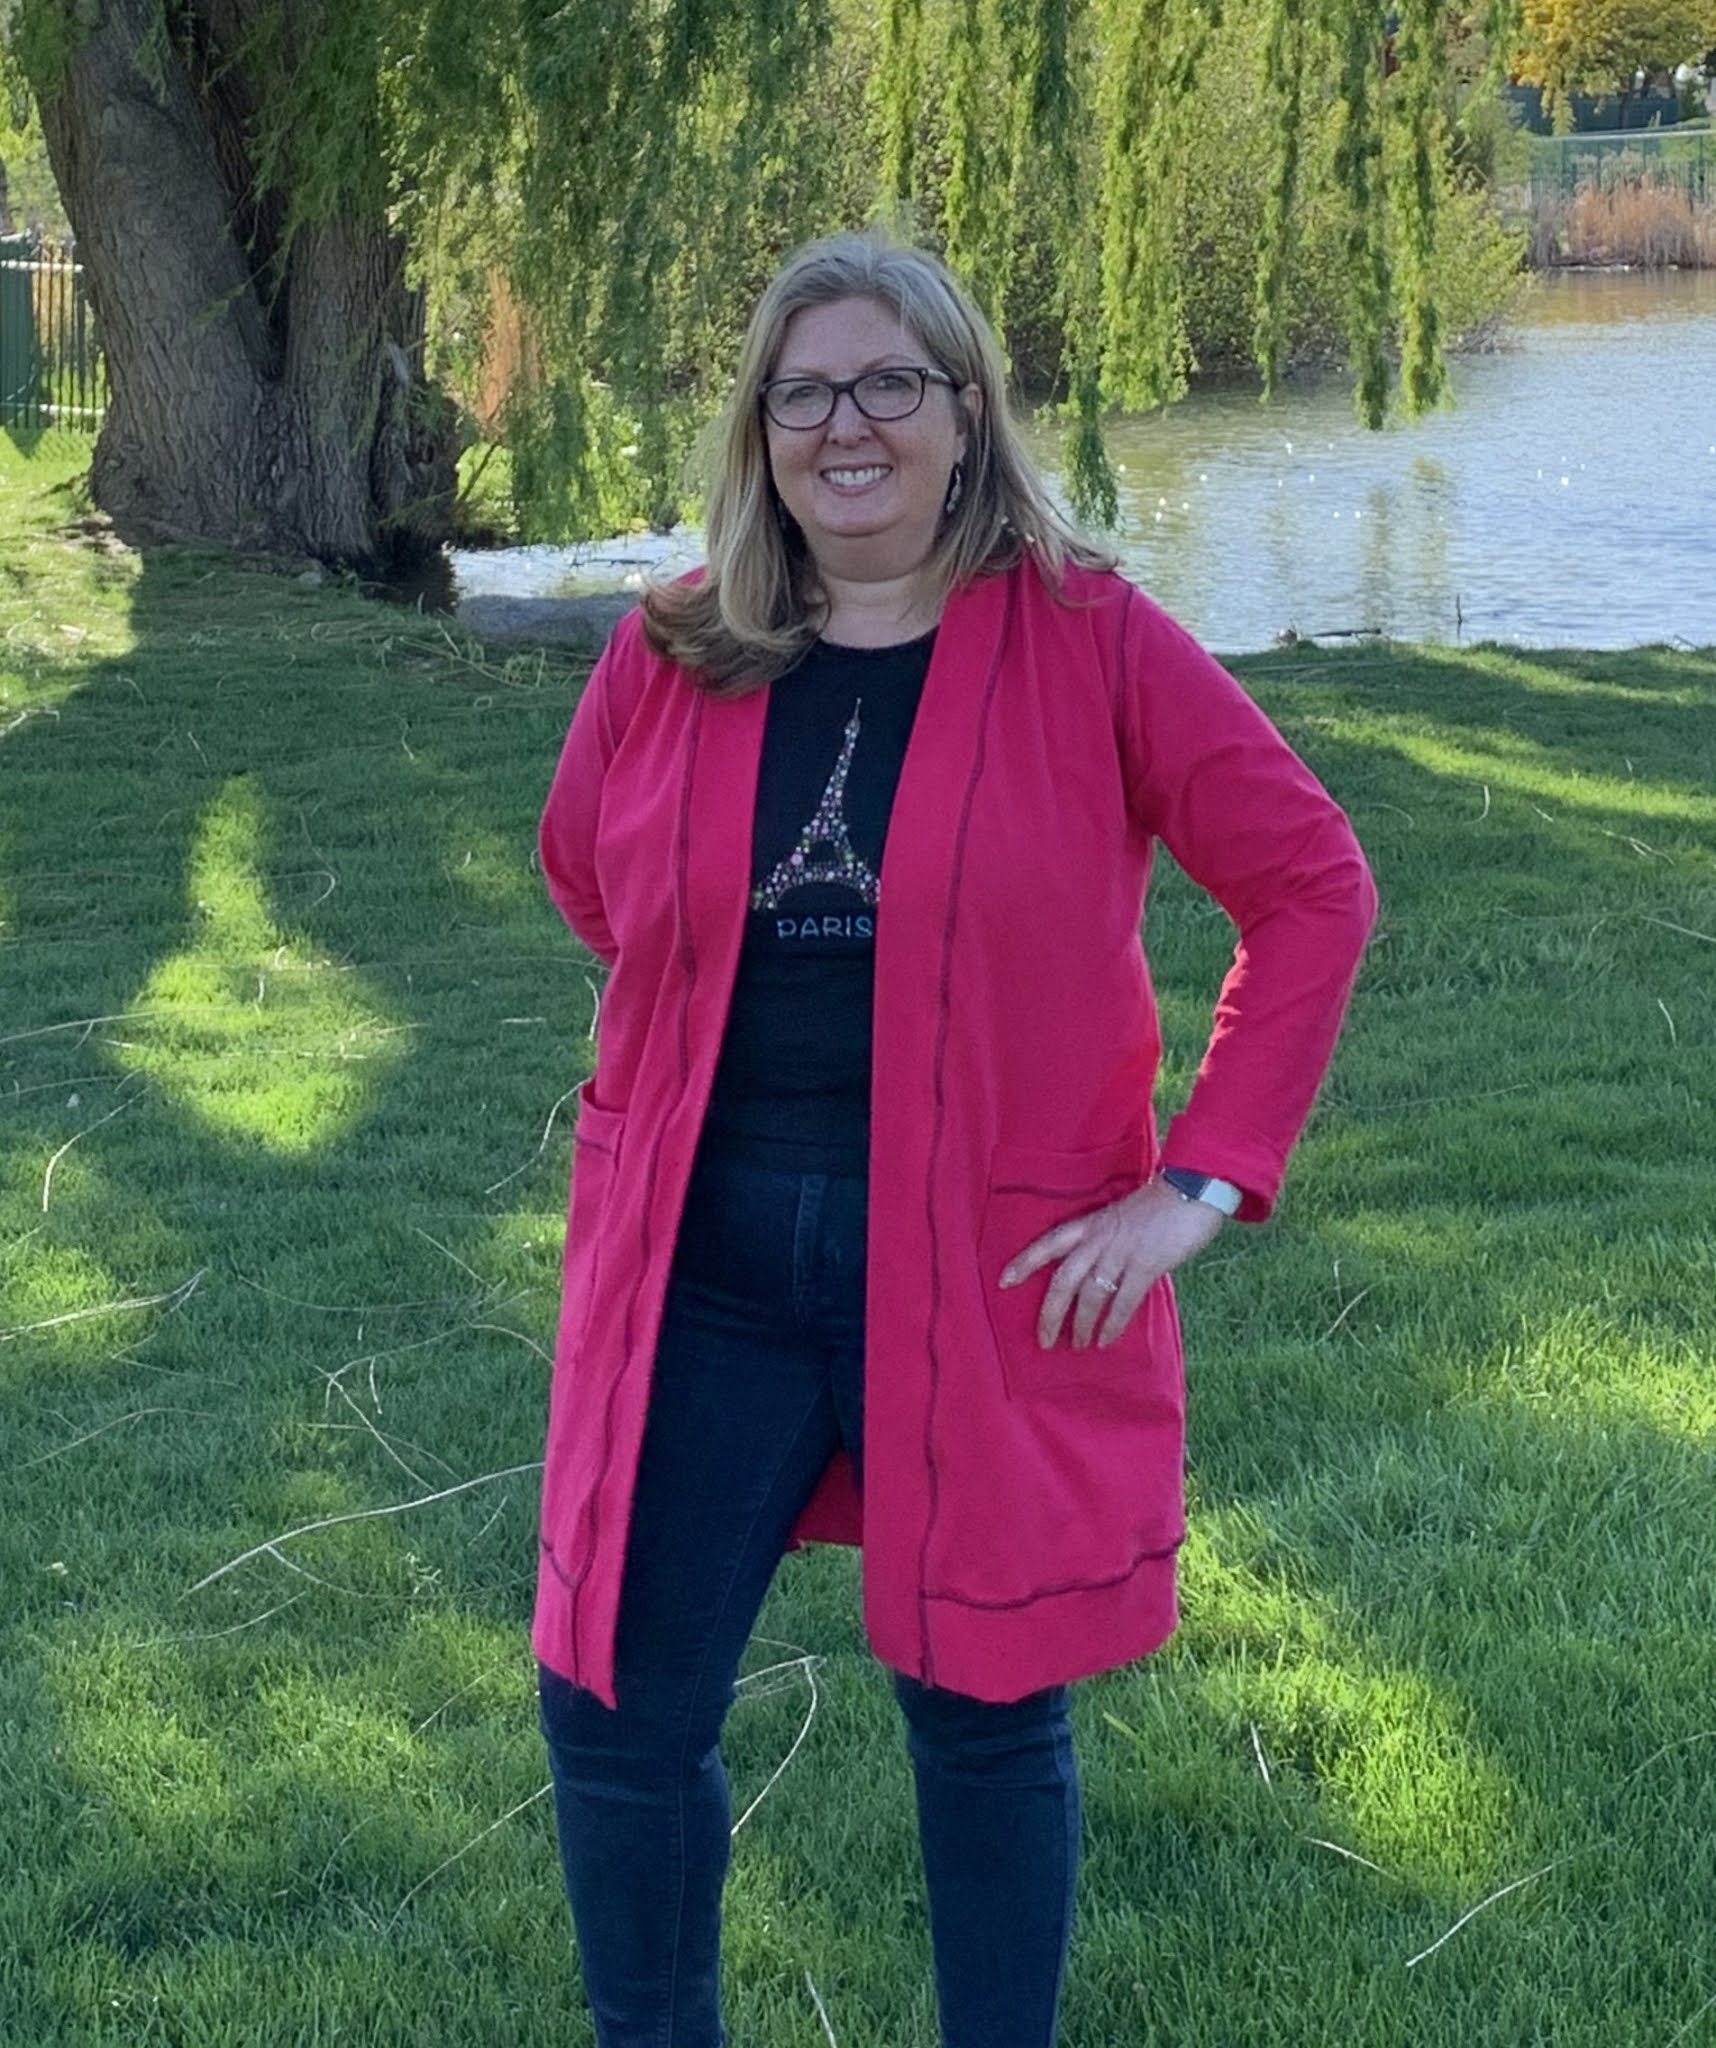
It was fun, but I used it to experiment with some serger detailing - and while I loved the pattern and loved the fabric, I haven't really been digging the serger detailing...so I've been wanting to make another one. I also needed a more basic, neutral cardigan to add to my wardrobe - but I really like my basics to have a LITTLE flair....so if I was going to make a boring color (black - no judging those who prefer a more neutral or muted wardrobe - it's just not always MY go to) I needed to have some fun details. 

I had bought some black double brushed jersey spandex blend knit from GirlCharlee awhile back that was earmarked for my basic black cardigan - It seems they no longer have this specific one - but it's a pretty thin knit with nice drape.

After spending lots of time looking at cardigan patterns, I settled on the Rebecca Page Circle Cardie. If you look at the pictures, one of the views has a really cute ruffle across the back.


So, I paid for the pattern, printed and cut it out, and got ready to sew. As I read the instructions I realized that this doesn't have a ruffle just across the back....it has a ruffle AROUND THE ENTIRE CARDIGAN. Neck, front edges AND back. Oh dear. That wasn't the look I was going for at all. I have looked through the ENTIRE Instagram #circlecardie and I can't find ANYONE who has posted a ruffled version of this make and the only picture of this view shows the back....see my confusion?? To be COMPLETELY fair, it is not SUPER gathered - The pattern says it is gathered at about 1.25x the total length - but it is also a wider binding than the band binding. It's possible that there ARE some pictures of the gathered hem view, and I just didn't realize it because it's not very tightly gathered?? Have you made this view? How did it turn out for you? I would LOVE to see a picture...I'm probably being dramatic....it's probably amazing! But even so, I fretted for a day, trying to figure out if I had wasted my money on the Circle Cardie Pattern. Then I decided to try a mashup. So, here's what you can do:


First, measure the bottom back edge where you actually DO want the ruffle. For my size, I wanted about 31" of ruffle across the back. So, I cut my ruffle piece to about 60" so I could have 2x fullness (If you're gonna do a ruffle, you may as well really do a ruffle, am I right??).  Then I measured the length of the band for the hem band finish and subtracted 30" from it - the band is a LITTLE smaller than the cardigan you are sewing it onto - you stretch it slightly. I had already cut out all the ruffle pieces - which was way more than the 60" I needed, so I repurposed these for the band at the new width. Then I tapered the ends of the ruffle so that it would have a more gradual transition to the band edging on the sides. I also tapered the band slightly on the ends. Finally I sewed on the ruffle and then finished the rest of the cardigan with the band - starting the ends of the bands just over the edge of the ruffle.

 I absolutely LOVE the finished product and I think there are quite a few more circle cardies in my future - in a variety of views!! I've decided it's super flattering and now that I know how to get that little ruffle detail for as much or as little of it as I want - there may be no stopping me....



Friday, February 12, 2021

Button Placement for the win!


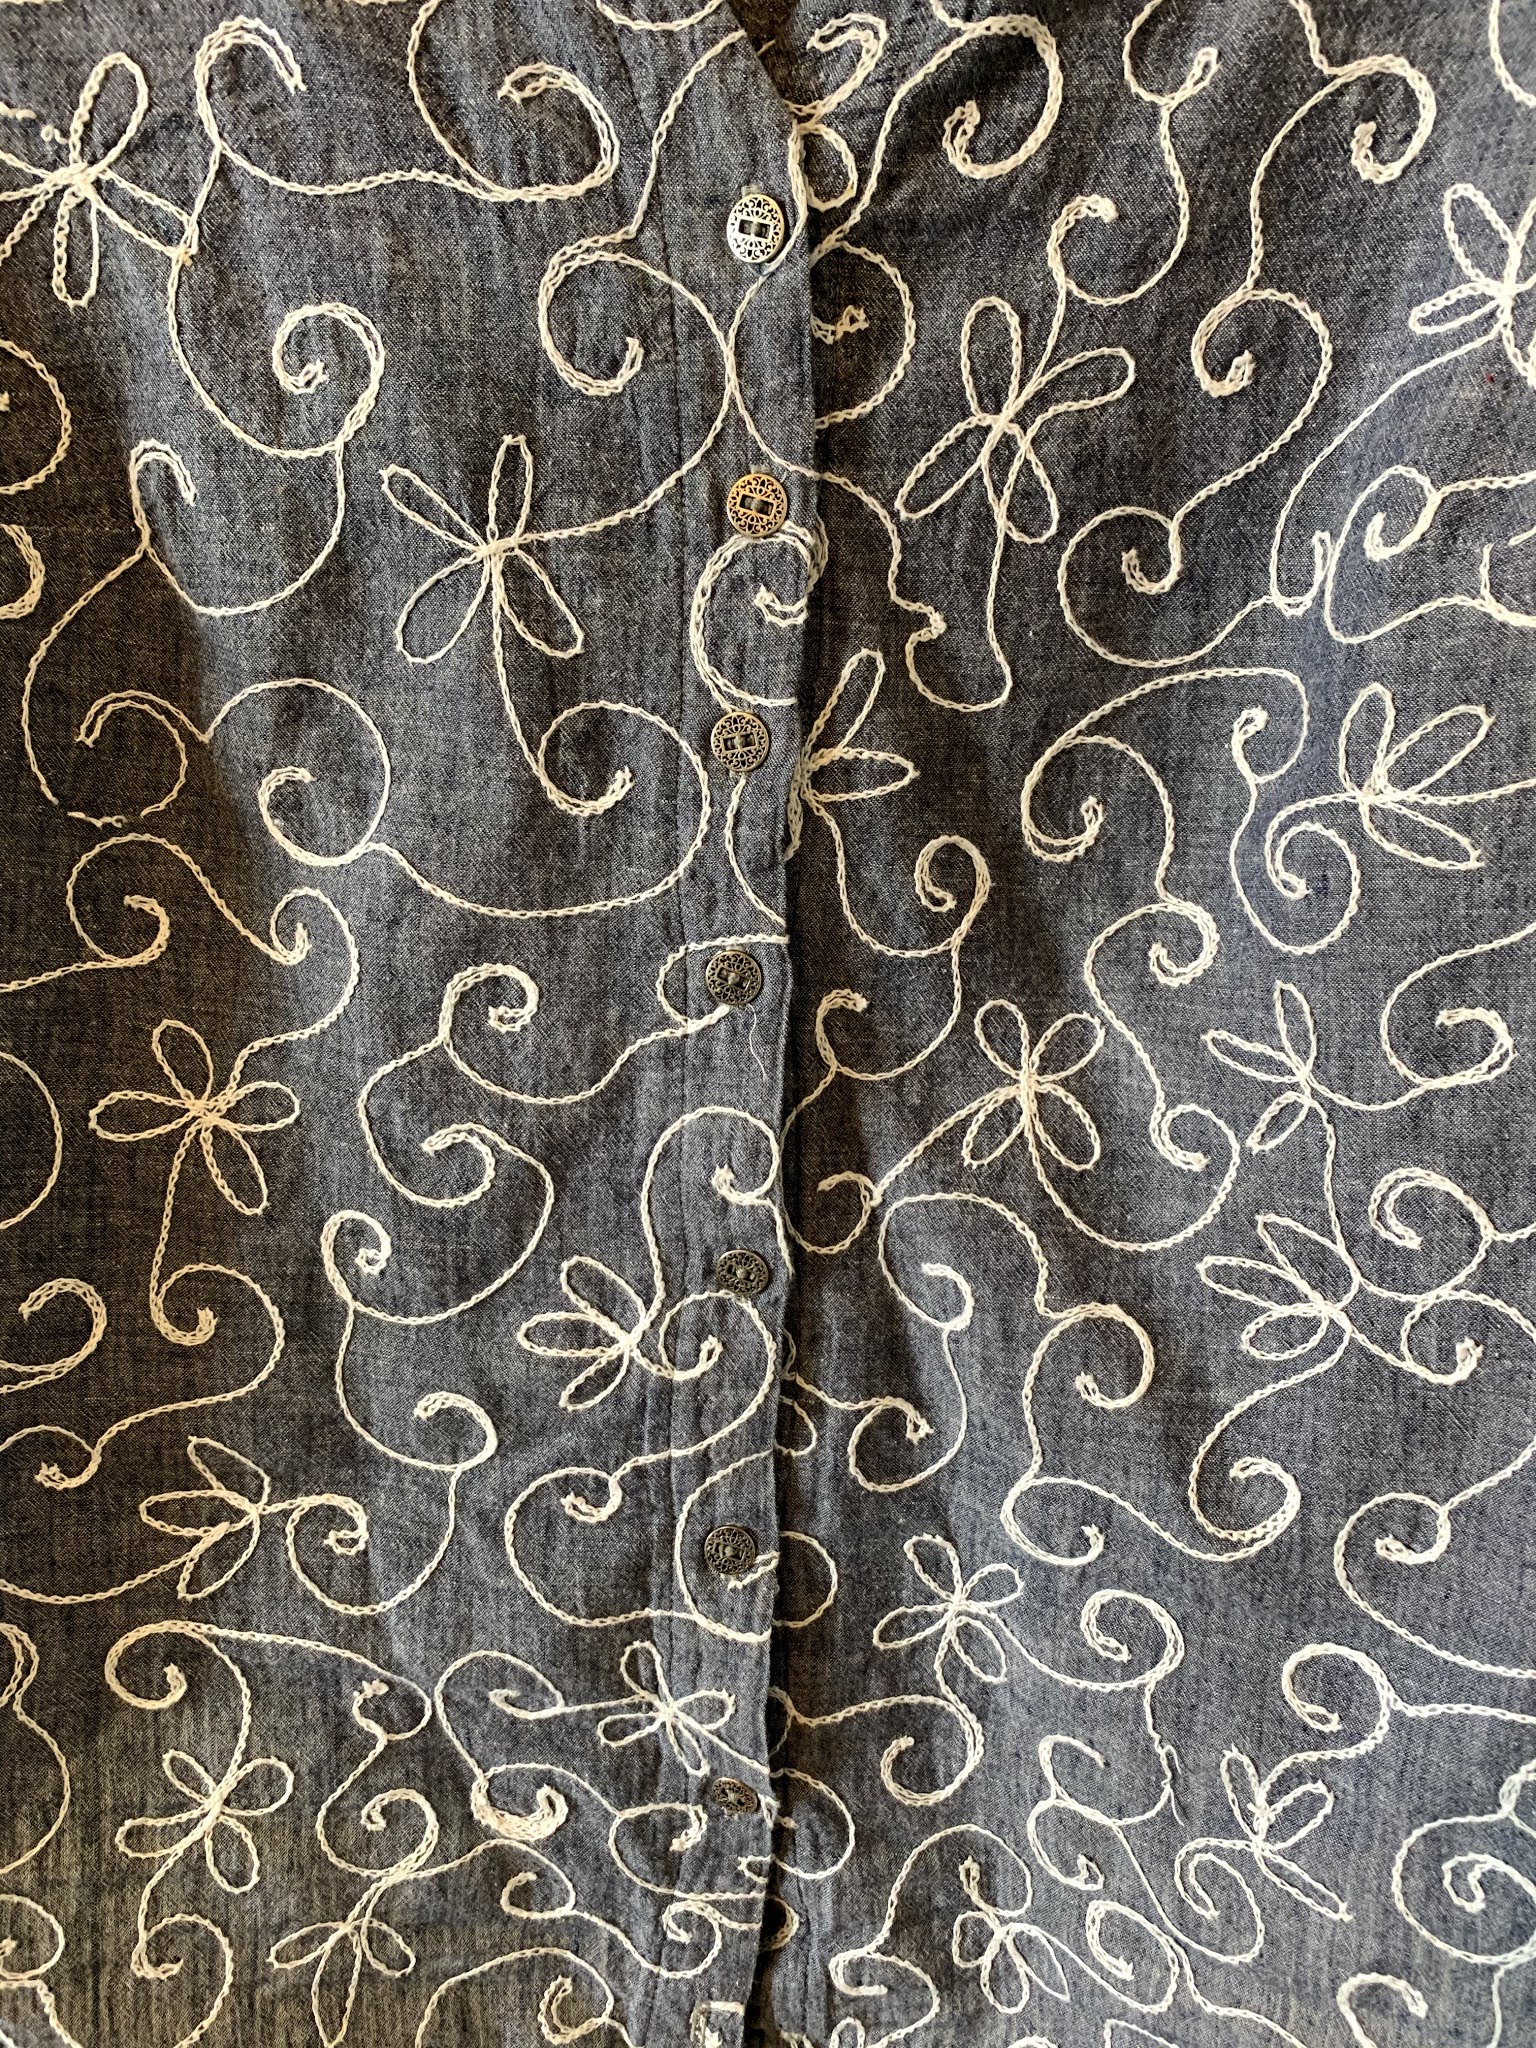
I bought some scroll floral embroidered chambray shirting from Style Maker Fabrics (The one I bought is no longer available, but it's similar to this one) awhile back and it was begging to be made into this Bonn blouse from Itch to Stitch. I have made this shirt one other time - I posted about it on this blog and also on Minerva.com . 
One of my favorite things about Itch to Stitch patterns are that they come in cup sizes. No more full bust adjustments!! However, as I've worn the last blouse, I have had a little trouble with gapping between the buttons. So...this time I decided to do my button placement differently. I placed a button right at the fullest part of my bust. Then I spaced buttons appropriately above and below. I also didn't worry about whether they were all equally distanced apart...and guess what? No one notices!! My buttons are spaced a little wider apart towards the bottom of the shirt and people only notice when I point it out to them. You COULD space them equally, but that would require more buttons if you want really good closure on top - and I hadn't thought of that at this point. For me, I'd rather have the closure where I need it. In the future I will probably buy extra buttons so that I have the option to make them all a little closer together - but I'm not scared of spacing them out how I need them. If you look closely in the picture below, you can see how I spaced them on this shirt.


While we are talking about buttons - let's talk about the button holes. My machine has a foot that you put the button in and then it usually makes the button hole the perfect size for the button. These buttons however are very very thin. That means that the button hole made by my machine was TOO BIG for these buttons. Always always always make a trial button hole and test your button in it!! I wound up having to find a smaller button to put in my button hole foot so that it would make the perfect sized button hole for these buttons.

Finally, I always measure my arms when I am making shirts, as that seems to be a place I wind up finding things fitting too tightly. In this case, I added an inch to the sleeve bands at the bottom of the sleeves. This means that the bottom of the sleeve is not as gathered as intended. If I make this shirt again, I will add a little more fullness to the bottom of the sleeve so I can get a little more gathering at the bottom without having too tight sleeves.

All in all, I have loved wearing this shirt! I might have to try the dress version next!!


Sunday, April 12, 2020

My Favorite Pants for Sewcial Distancing

Or any time for that matter!! I have had joggers on my list for awhile - and I finally got around to sewing some up just in time for CoronaVirus! I literally wear. them. all. the. time!! Well, today I finally put on some jeans...but seriously! Let's talk about these!!


The weather here is not very nice today - and I think we are stuck with dumb weather for most of the week. Luckily, last week was beautiful and my social distancing protocol included some hiking! You know I wore these joggers!!

I used this ponte de roma fabric from Raspberry Creek Fabrics. I had never sewn with ponte roma before and I really loved it! It is so soft, stretchy but stable and super comfy to wear! It's the perfect weight for fall/winter/spring. I think it will be too warm for summer wear - but I rarely wear pants in the summer anyway.


I kind of obsessed over which jogger pattern to use - there are a lot of great ones out there! I finally settled on the Greenstyle Creations Iron Joggers. My biggest hesitation with these is that it is a unisex pattern and I get nervous about trying to fit my curvy self into a men's pattern. I haven't tried making these for my hubby (yet) but they worked great for me! So - if you have this hesitation, you can relax about that!

They have several lengths - not only for fit, but also for style which is nice. Shorts, capris, and pants length, but then you also get to choose your inseam length.


You can choose slant or zipper pockets for the front pockets - I chose slant pockets and I like them. Be careful when you sew them on that you catch the pocket all the way around since the pocket stitching shows it can be hard to recover if you don't!


You can also add zipper back pockets one or two - so that's fun! My only regret here is that JoAnn's only had plain grey zippers, and I wish I had been patient enough to wait to order some hot pink ones online! This would be a fun place to add an accent color! I will have to make another pair....Oh! and I know zippers can be scary...but the instructions are great and I had NO PROBLEM installing these zippers! Easy peasy!

You can choose cuffs on the bottom or not. I love the cuff option and the Ponte De Roma I used worked great for cuffs.

Finally, a note about the waistband.  The instructions have you make the drawstring holes (button holes or grommets) in the waistband, then insert the elastic in the folded over waistband and THEN attach the waistband. This works pretty well, with a caution...I'll get to it. After attaching the waistband you sew a channel for the drawstring through all the layers - waistband and elastic. FINALLY you thread the drawstring into your pre-made holes. Unfortunately I didn't think this all the way through and my grommets were a little too small. They fit the drawstring, but not a safety pin, or a knotted drawstring.


Sooooo.....when you pre-make your holes, make sure they are big enough to get your safety pin through. Threading a drawstring without a safety pin on the end is NOT FUN. Just sayin. And I definitely know.... And now you know how to avoid that disaster! You can thank me. ;-)
I hope you give these a try! Stay safe, healthy and sane!!

Wednesday, October 23, 2019

My first post on the Minerva Blog!

I have been writing blog posts for Minerva and have several that will be posted over the next few months. The first one posted yesterday!! So, if you'd like to go have a look, you can find it here.
I sewed a basic cream blouse

using the Bonn Shirt Pattern by Itch to Stitch and some viscose twill from Minerva.


Unfortunately I moved this blog after I wrote that post - so the link at the bottom doesn't work. But leave a comment! Say hi! Thanks for reading!!


Monday, October 14, 2019

TNT Pattern Numero Uno!

Rochester, Minnesota - a place that holds a special place in my heart!
Guess what?? (Forgive me for a second....I feel like I'm announcing the birth of a child....) I've been sewing long enough to find a TNT pattern! Okay, well, maybe I've only made it twice now. But....since I have not been garment sewing for myself until recently I have made a variety of patterns, but only one other more than once. I hear people talk about TNT (Tried aNd True for those less obsessed) patterns on social media, and I have just not been sewing long enough (again anyway - if you missed my sewing journey story, you can find it here) to be able to relate to this.

Recently I was gifted some fabric from Minerva and I made it into a Lotus Blossom Blouse by Love Notions. That will not post on the Minerva Crafts Blog until Feb 2020, but you'll see it there eventually! I LOVED THIS BLOUSE SO MUCH!

The pattern also has the option to add a contrasting back piece. I did this on the first blouse - but I did not include a contrast piece on the purple version.

Split Point along The Great Ocean Road - South Coast of Australia

I had some awesome crinkle knit that I had picked up earlier this year when I was in Sacramento. I make a habit of wandering into any local fabric shop I can find when I travel. So, Hi-Fashion Fabrics wasn't too far from where I was staying. Loved that place!! If you live in Sacramento, you are lucky! But I digress....I KNEW this fabric would be perfect for the Lotus Blossom Blouse! This pattern is designed for knits that are the same on both sides - read solids and stripes. There IS a work-around - so although the Minerva Crafts fabric had a definite wrong side, I was able to cut the front in half and re-sew it together. That way when it gets twisted the correct side of the fabric shows on both the right and left of the blouse! The purple fabric didn't have this problem.

Manley Beach, Sydney, Australia

I was reading posts on Instagram and saw someone complaining about how knit hems are the worst. I understand this. It might be one of the reasons I quit sewing clothing 20+ years ago. I would hem something and the hem would come out all wavy. So frustrating!! Let me share the trick it took me a bit to find. H E M  T A P E. This is a fusible interfacing type strip that stabilizes the fabric and also holds your hem closed. Here is a picture of it lined up and ready to iron into the hem. It must be completely enclosed in the hem or it will stick to the iron.


It makes it so easy to do a hem and then I also love to stitch it down with a double needle. Let me know in the comments if you need more info on this method. I could do a post about it. After I get home anyway...since I don't have all the pictures needed to write the post now. ;-)
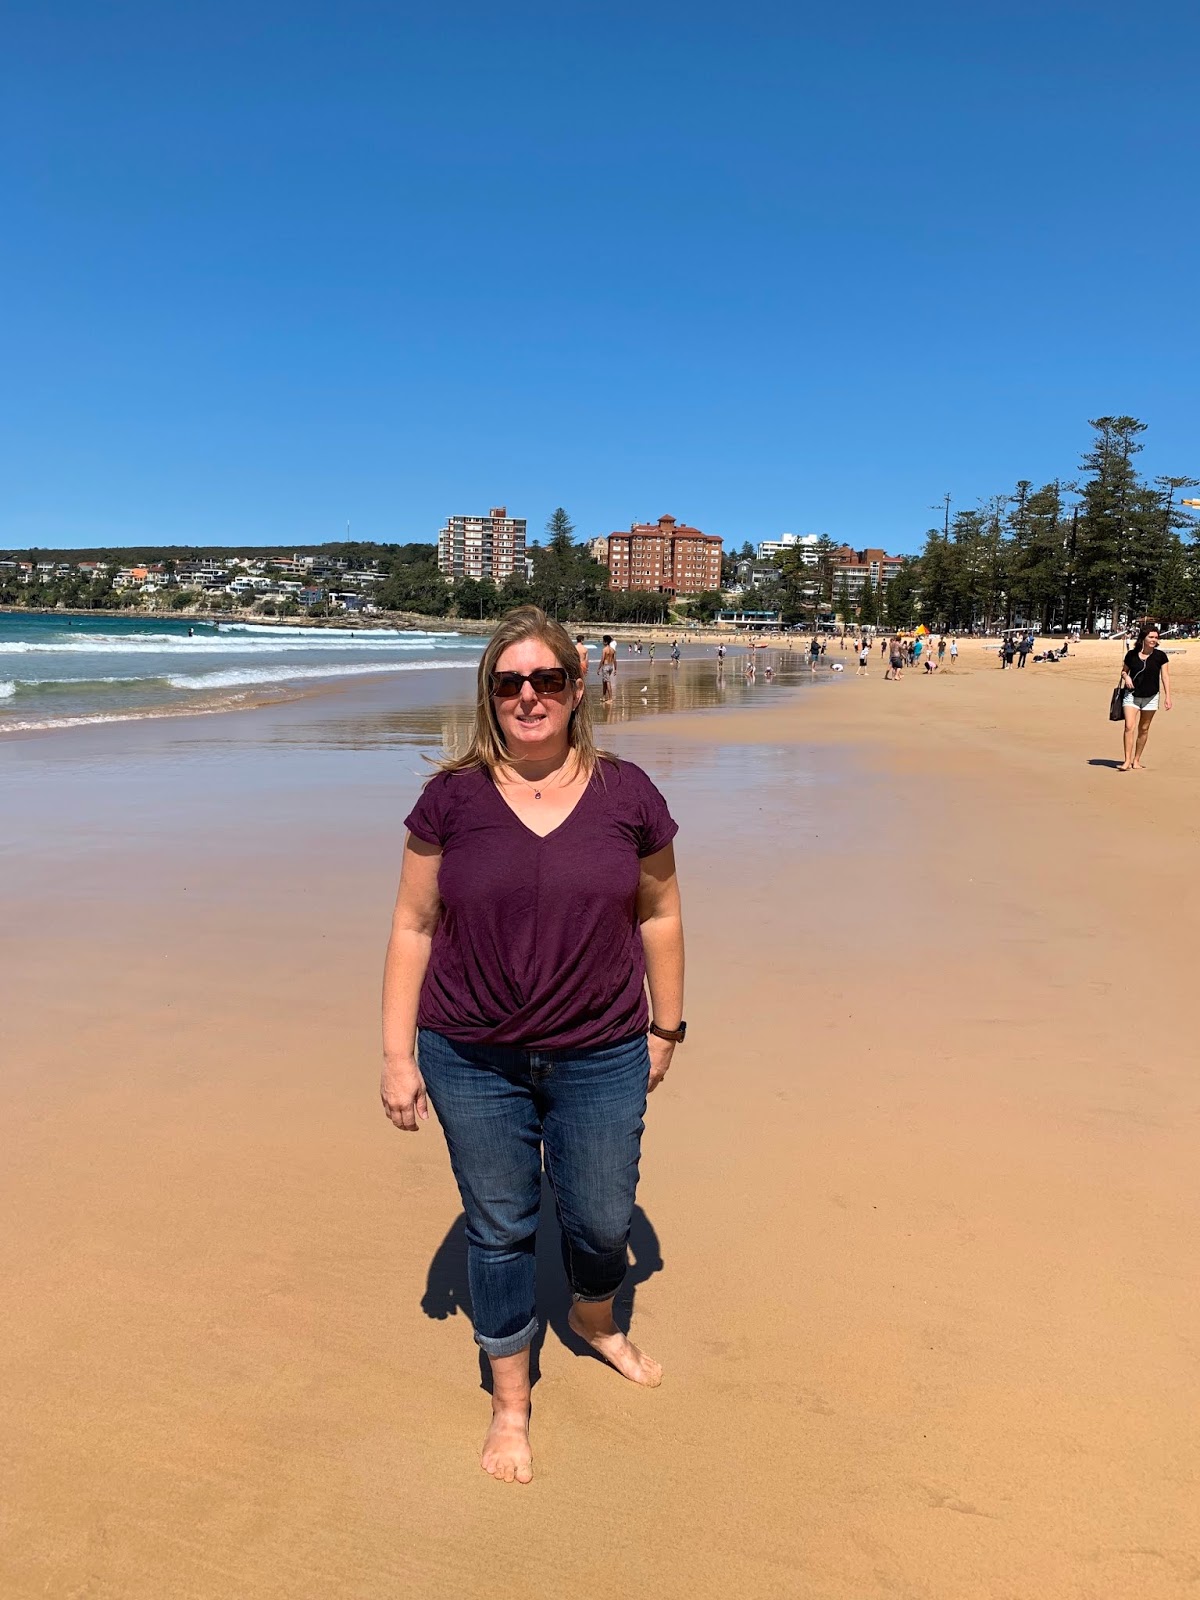
At any rate, I really like the way they both turned out. We are currently spending about a month in Australia - and you can see they are getting lots of wear!!

Tuesday, June 25, 2019

Alterations

This used to be a bad word to me. But I have found that reframing something can help you have a better attitude about it! This is true for sewing as well! So here's what I have been telling myself about alterations....
Something I love about sewing is that I can take something that I don't wear very often because it doesn't fit well and turn it into a favorite!
A week and a half ago, I decided I was going to fix the pile that had accumulated in my sewing room.


I had two ready to wear shirts - one long sleeved work shirt for my husband that had a huge tear in the sleeve. Easy, cut the sleeves off and make it a short sleeved shirt.

The purple shirt is one I had liked, but decided it was too long, so I wanted to cut a few inches off the bottom and re-hem it. 


You can see the purple shirt underneath a shirt I like the length of - that was my cutting guide!

Finally, there was a dress I made (and blogged about here) but just haven't loved the way it fit. I finally figured out that I needed the bodice to be shorter. I also didn't like how low the neckline was, so if I took in the shoulders that would fix both problems and luckily there was enough space in the armscye to do it!


It was also still a little too big through the waist - even though I have already taken it in once. (I'm not losing weight - I just clearly need more practice at alterations!!)


As luck would have it, I got a little side tracked by yard work the day I decided to tackle these, but I have chipped away at them over the last week and I'm happy to say I have worked through the pile!!
I'm so happy to have things that will actually get worn! It's the ultimate sustainability project!


You can see there's still plenty of length there!!

Finally, the dress fits much better as well!
Do you have clothes hanging out waiting for a few little tweaks before they can get worn? Do it!!


Thursday, March 21, 2019

Do I really want Spring though?


It was a race with the calendar and I'd never felt so conflicted. I love sunshine. I love spring. I'm tired of winter. But I also had fabric for a Brunswick Pullover that wasn't made yet. I finally got to it this past week. I even got to wear it on a cool day and now it is warming up - today in hometown, USA it was 62 and tomorrow it's supposed to be 65. That's what I call having your cake and eating it too!! I won't even be sad if the forecast for a 50 degree and cloudy day on Saturday turns out to be right because then I get to wear my Brunswick again!

The Brunswick Pullover is a pattern by Hey June Handmade. It is really well written and easy to follow and there are some fun - advanced beginner - techniques showcased.

I had this beautiful hacci sweater knit from Raspberry Creek Fabrics and needed a complementing woven fabric. I found the perfect burgundy in my stash (ie - I have no idea where it came from or how long ago!).

When I was getting the pocket ready, I wanted to add some interest, so I tried sewing the pocket on with a decorative stitch. I did not like it....but it gave me an idea! I took that decorative stitching and decorated the whole pocket - I love the way it turned out!


I also ordered some wooden buttons on Etsy. I was planning to use the wooden ones with flowers and I ordered the Boho ones on a lark. Upon auditioning them though I realized I loved the Boho buttons. The pop of color adds to the fun!


It has been a long time since I sewed button holes. I did a practice one, but even with that, I still messed one up. Pretty good. I picked it out once, but screwed it up again. This time I just tried to fix it manually. It doesn't look perfect. But it was good enough. I learned something along the way....

PSA - Make sure NOTHING touches the pull down sensor as you sew the buttonhole (not your finger, the folded over fabric or anything else...) This will make the buttonhole think it's done. That's super annoying. Unless you like to unpick buttonholes.


I also decided I should learn how to sew buttons on by machine. That is fun and fast!! Here's my "learned the hard way" tip from that exercise...

Pull the thread on the machine long before you start stitching. This gives you a long enough thread to hand tie it easily. When you finish sewing the button on, pull the threads out long again. I threaded these through a needle and went back down through the button and wrapped a shank around the threads before pushing the needle through to the back. You can then tie the top and bottom threads together to secure the stitching. Voila! Done!


See those cute Boho buttons???

The hood was the last detail and it went together without a hitch.

I love all the details on this sweatshirt and they were worth the extra time. As we head into spring, this may not be at the top of your to-make list, but add it to your Pinterest board (or however you keep track of the projects you want to sew) and file it away for fall...you won't be disappointed!!


Sunday, March 17, 2019

Adjustments are good!!


I picked up this yummy fabric when I was in Germany late last year.


My husband was working in Stuttgart and I had been stalking sewing Instagram accounts and wanted to start sewing more clothing, but hadn't started in earnest yet, so I spent a day taking the bus and train from one fabric store to another and checking out all the fabric stores in town. I found this fabric at a great little store called Esro jersey fabric sales E. K.


They were super nice to me even though I speak almost no German! AFTER purchasing the fabric and getting it home I realized I really wish I had gotten the information about the fabric content. Unfortunately, all I can tell you is it is a knit jersey of some type. Super soft and drapey.... I had a pattern in mind, but changed my mind because I think this fabric was too stretchy. When I had the Sienna Knit Dolman fail then I realized that this fabric would make a beautiful Sienna Knit Dolman top. I measured myself and my measurements fit exactly to one size (that's kind of crazy....that never happens!!).

I decided to lengthen the sleeves. I have short arms. Because the sleeve is the same piece as the front and back, if your arms are very long, you may have trouble getting a long sleeved version to fit on your fabric. But I digress. This sewed up quickly and beautifully - but after wearing it a few times I decided it was really a little too big.

Sometimes I get frustrated by the adjustments that are always required with garment sewing. However, I'm teaching myself to think differently about it (a good skill for most things in life!!). Adjustments usually don't take that long in the big scheme of things and the payoffs are huge!! I now LOVE the fit of my Sienna Dolman top!!


To adjust it, I had to remove the neckband and then I took in the shoulder seams. This made the neck opening less gaping and took up some of the excess in the sleeves. I also cut off the sleeve hem and re-hemmed. I seem to always underestimate how short my arms are. When I had sewn the neckband on the first time, I top-stitched around it with a double needle. I like this look a lot, but it seemed to stretch the neck out a bit. It didn't look terrible, but I was a little disappointed. It also made removing the neckband a real pain! However, once I got it off, made the adjustments, and sewed it back on, I omitted the top-stitching and I think it looks better! No before pictures for you, because I'm still getting the hang of this blog documenting thing....but look at these cute ties that make some really nice ruching!! Love this detail!


Thursday, February 28, 2019

Kimberly Dress

I needed a new dress. No reason. Just sick of the ones I have. After looking at lots of patterns and fabrics, I finally settled on the Kimberly dress by Athina Kakau.

Based on my measurements I decided to size up at the waist and cut everything else a straight size. I ended up taking the waist in, so I should have just stuck with the one size. This dress has darts and an invisible zipper. I really liked her tip for the darts - she recommends pulling the bobbin thread through and tying a knot to secure the end of the dart. I think her directions for the zipper could have been more complete - I haven't done an invisible zipper in years! BUT - there are lots of great tutorials online that can help you through it. I used "How to sew an invisible zipper step by step by Angela Wolf". She tells you to sew REALLY close to the zipper teeth when you are sewing the second side. I thought I did - but I didn't realize HOW close. When she says to sew right next to the teeth, she means RIGHT NEXT TO THE TEETH! I had to unpick it to get a truly invisible zipper. However, in the end, I think it turned out really nicely!!


Some other things to be aware of....this pattern is not suitable for 42-45" wide fabric. It has to be the wider 56-60" fabric. Most woven fabric comes in the narrower width - so be careful! Otherwise you will wind up piecing a wider piece together to cut your skirt out. I didn't notice this, and got lucky when I bought my fabric.

I love the drape of the rayon I used. But I also knew I wanted to use a contrasting fabric for the hem band. I bought the beige linen I used as well as the sheer lace with the intent of double layering them and using them for the hem band. I got it all done and the lace made the hem band too stiff, I didn't like it at all. I unpicked the hem band and tried it with just the linen which I liked much better. I then used the lace to make the tie - I love it there!!


I wish that the pattern had given me help with how much contrast fabric I would need. I figured I would be able to make it from 1/2 yard fabric - but I was wrong. I had to make a second trip to JoAnn's to get more fabric. Luckily, they still had the same fabric. The hem band piece is basically a rectangle 56-60 inches long by 10.5 inches wide cut on grain. You cut two of these. You can piece it if you need to - so knowing that, if you want a contrasting band you should be able to figure out how much fabric you need. (2/3 yard if your fabric is wide enough - otherwise 1 - 1 1/3 yards)

Why do I learn everything the hard way?? I was leaving on a weekend trip to Arizona and really wanted to take this dress. All I had left to do was the tie - so I hurried and finished it and made it half the length it was meant to be (which meant it barely tied) and twice the width. I didn't realize this until I got to Arizona and went to wear the dress. I decided I liked the (unintentional) width of the tie, but I wanted it longer. Upon returning home I was able to unpick the end and add some more length to it.


It was raining when I was wearing the dress in Arizona - so no good pictures anyway!

Finally....The dress has POCKETS!!!! Gotta be excited about that!!

Saturday, February 23, 2019

My Journey back to garment sewing

I love plain long-sleeved t-shirts in the Winter. I love to pair them with sweaters, jackets, vests and scarves.  Here's a picture of me with my husband and a daughter and her husband in one of my old long-sleeved tees (one I can no longer wear....because it has holes in it....)


I had bought some ready-to-wear long-sleeved tees from Gap and Banana Republic and they had all wound up with little holes in the front around the waistband. I was getting so tired of buying shirts and having them wear out within a year or less that I was prepared to take drastic action!!

About the same time I was dealing with this frustration, I started noticing one of my friends posting lots of home-sewn clothing items. I remembered that I used to sew clothing, but I had gotten away from it. I'll discuss the reasons later...but all of my sewing of late had been mending, quilting (which I still love), altering clothing for my daughters (making it fit better, more modest, etc) and costumes for school plays. However, all my children are grown and gone (mostly - I still have the odd one home for a few months or weeks at a time - but they are mostly on their way out) and I was so inspired by my friend.

I also went to Dallas last year with my husband on a business trip. His cousin, Abi Ferrin, lives there and we went out to dinner with her. She has a fabulous line of designer clothing that she makes and sells from her studio and shop there in Dallas. She showed us around her studio and I also went and checked out her shop. She sells high-end designer ready to wear clothing, but her journey to this business was as a seamstress. More inspiration!!

These two women made me really want to get back to garment sewing. One of the problems I had 25 years ago when I was sewing was that I would pick out a pattern and get it sewn up and not really like how it looked on me. Some of this is learning how to pick fabrics, some of it is learning how to fit patterns and some of it is being able to know what a pattern looks like on your body type. I have LOVED LOVED LOVED following the sewing community on Instagram. It might be one of the best things to happen to home sewists. You can look at a hashtag for a certain pattern and see what that pattern looks like sewn up in all different types of fabric and on all different types of bodies. It really helps me to figure out what I like BEFORE I invest the money and time into a project. So, I started this blog and my sewing Instagram account in an effort to add to the resources for other sewists. Also, it's fun to be a part of this community and share what you make with people who appreciate it!!

So, introduce yourself! Comment! Help me find more patterns I will like! And be the inspiration for someone else - and thanks for welcoming me into the lovely online sewing community!!

Sunday, January 27, 2019

Fab Fabric Choice

I have started ordering fabric online. It's fun to support independent shops - even if they're not local (I don't have any local apparel fabric shops in my town) - and I think I might get better selection and better quality from these independent shops than I do from my local chain store. HOWEVER.....the down side is that you don't always know what you are getting irl. The more I shop this way, the better I get at it, and I have been keeping a notebook with fabric swatches and descriptions so that I can learn what different descriptions translate to in real life.
         *As a side note, I sometimes use irl in my talking with my kids - it gives me instant street cred!!
Anyway, I ordered this fabric


from Girlcharlee.com . I had a plan for it. I was going to make the Sienna drawstring knit dolman top from Sinclair Patterns. 


When the fabric arrived, I looked at it, and thought "SKIRT". But....I had a plan. I consider myself a pretty flexible person. But sometimes I hate to change the plan. So, I started sewing. I got it mostly made and tried it on for fit to discover that those pretty diamonds?? Yeah. They totally outlined my boobs. Also, I hadn't centered the print on the fold - so they outlined my boobs, but not perfectly. A little off center.


I'm not sure that photo does it justice. But it's the only one we're gonna get since I decided that the fix would be to make it into a skirt. I cut off the sleeves, cut off the neckline and added a waistband. It turned out pretty cute! And I love the cozy sweater knit!!

Here's the finished skirt: